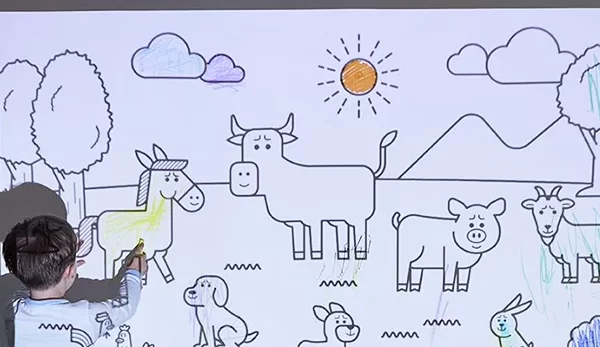
If you’re an artist who wants to transfer your designs onto a larger surface or create an exact replica of a reference image, using a projector can be an efficient and accurate way to do so. Whether you’re working on a mural, a canvas, or a wall, projecting an image can help you save time and effort, while ensuring that your artwork is precise and proportional. In this article, we’ll guide you through the process of using a projector to trace art, from choosing the right equipment to setting up your workspace and troubleshooting common issues.

Table of Contents
- Introduction
- Benefits of Using a Projector for Tracing Art
- Choosing the Right Projector for Tracing Art
- Preparing Your Workspace for Projecting
- Preparing Your Image for Projection
- Positioning the Projector and Image
- Tracing the Image onto Your Surface
- Tips for Achieving Accurate Tracings
- Common Issues and Solutions
- Cleaning and Maintaining Your Projector
- Conclusion
- FAQs
1. Introduction
Tracing can be a useful technique for artists who want to create accurate drawings, paintings, or murals. By tracing a reference image onto your surface, you can ensure that your proportions, perspective, and details are correct, without having to spend time and energy sketching freehand. However, tracing can also be challenging, especially if you’re working on a large or complex image, or if you’re trying to replicate a photo or a print. That’s where projectors come in handy: by projecting your image onto your surface, you can create an exact copy of your reference, without having to worry about scaling or distortion. In the following sections, we’ll show you how to use a projector to trace art, step by step.
2. Benefits of Using a Projector for Tracing Art
Using a projector to trace your images can offer several advantages over other tracing methods, such as using a lightbox or grid. Here are some of the benefits of using a projector:
- Accuracy: Projectors can display images at their original size and resolution, which means that you can create an exact replica of your reference, without having to scale or resize it manually. This can save you time and effort, while ensuring that your proportions and details are correct.
- Versatility: Projectors can project images onto a variety of surfaces, including walls, ceilings, floors, and canvases. This means that you can create murals, large-scale paintings, or detailed sketches, depending on your needs and preferences.
- Speed: Projectors can help you trace images faster than other methods, since you don’t have to spend time drawing or measuring. This can be especially useful if you’re working on a deadline or a commission.
- Convenience: Projectors are portable and easy to set up, which means that you can use them in different locations or studios, without having to invest in a permanent setup. This can be helpful if you’re a freelance artist or if you travel frequently.
3. Choosing the Right Projector for Tracing Art
Before you start using a projector to trace art, you need to choose the right equipment for your needs and budget. Here are some factors to consider when selecting a projector:
- Brightness: The brightness of a projector is measured in lumens, and determines how well the image will show up in a well-lit room. For tracing art, you’ll need a projector with at least 2000 lumens, but preferably 3000 or more.
- Resolution: The resolution of a projector determines how sharp and clear the image will be. For tracing art,
- you’ll want a projector with at least 1080p resolution, but higher resolutions such as 4K can offer even better clarity.
- Size and weight: Depending on your workspace and portability needs, you’ll want to choose a projector that is small and lightweight enough to carry around, or large and sturdy enough to project onto walls or ceilings.
- Connectivity: Make sure that your projector has the right ports and cables to connect to your computer, tablet, or phone, depending on your preferred method of displaying your image.
- Price: Projectors can range from less than $100 to several thousand dollars, depending on their features and quality. Consider your budget and how often you’ll use the projector before making a purchase.
Some popular projectors for tracing art include the Artograph Flare100, the AAXA P300 Pico Projector, and the Epson PowerLite Home Cinema 880.
4. Preparing Your Workspace for Projecting
Once you’ve chosen your projector, you need to set up your workspace for projecting. Here are some steps to follow:
- Choose a well-lit room with minimal glare or reflections. Ideally, you’ll want to use a dark room or a room with adjustable lighting.
- Set up your projector on a stable surface, such as a tripod or a table. Make sure that the projector is level and pointing towards your surface.
- Adjust the distance and angle of your projector to fit your image and your surface. Use the zoom and focus controls to make sure that your image is clear and in focus.
- Make sure that your surface is clean and smooth, and that you have enough space to trace your image without interfering with the projected light.
5. Preparing Your Image for Projection
Before you can project your image, you need to prepare it for projection. Here are some tips to follow:
- Choose a high-quality image with good contrast and clarity. You can use a photo, a print, or a digital file.
- Resize and crop your image to fit your surface and your projector’s resolution. Use image editing software such as Photoshop or GIMP to adjust the size and aspect ratio of your image.
- Save your image in a compatible format, such as JPEG, PNG, or PDF. Make sure that your image is saved at a high resolution, such as 300 dpi or higher.
- Connect your computer, tablet, or phone to your projector, using the appropriate cable or wireless connection. Make sure that your device is set to display the image in full-screen mode.
6. Positioning the Projector and Image
Once you’ve prepared your workspace and your image, you can start positioning your projector and your image. Here are some steps to follow:
- Turn off the lights in your room or dim them to a low level. This will help to reduce glare and reflections.
- Turn on your projector and adjust the brightness and contrast settings to fit your room and your image.
- Position your projector so that it’s pointing towards your surface, and adjust the distance and angle to fit your image and your surface.
- Use the keystone correction controls to adjust the shape and alignment of your image, if necessary.
- Make sure that your image is centered and scaled correctly, and that there are no distortions or unevenness.
7. Tracing the Image onto Your Surface
Once you’ve positioned your projector and your image, you can start tracing your image onto your surface. Here are some tips to follow:
- Use a pencil, a pen, or a marker to trace the outlines and details of your image onto your surface. Make sure that your lines are clear and accurate.
- Use a ruler or a straight edge to help you trace straight lines and angles.
- Use a eraser or a correction PEN
- Take breaks and step back from your work occasionally to check your progress and make sure that your lines are accurate and consistent.
- Once you’ve traced your image, you can remove the projector and clean up any leftover marks or smudges.
8. Tips for Using a Projector to Trace Art
Here are some additional tips for using a projector to trace art:
- Use a high-quality projector with a bright lamp and good color accuracy for the best results.
- Use a matte surface, such as a piece of paper or a canvas, to minimize glare and reflections.
- Use a small, portable projector if you plan to travel or work in different locations.
- Experiment with different projector positions and angles to find the best setup for your workspace and your image.
- Use a wireless or Bluetooth connection to avoid tangling cables and to work more freely.
want to learn more about projectors?

Conclusion
Using a projector to trace art can be a useful technique for artists of all skill levels. By following these steps and tips, you can create accurate and detailed tracings of your favorite images and photos. Remember to choose a high-quality projector, prepare your workspace and your image, and take your time to ensure the best results.
FAQs
- Do I need a special type of projector for tracing art?
No, you don’t need a special type of projector for tracing art. However, a high-quality projector with good color accuracy and resolution can produce better results.
- Can I use a projector to trace images onto a canvas?
Yes, you can use a projector to trace images onto a canvas, as long as the canvas is flat and smooth.
- Do I need to be an artist to use a projector for tracing?
No, you don’t need to be an artist to use a projector for tracing. Anyone can use this technique to create accurate and detailed tracings.
- Can I use a projector to trace onto other surfaces besides paper or canvas?
Yes, you can use a projector to trace onto other surfaces such as wood, metal, or plastic, as long as they are flat and smooth.
- Is tracing art considered cheating?
Tracing art is a common technique used by artists for centuries. It can be a useful tool for learning and practicing different styles and techniques. However, tracing someone else’s artwork and claiming it as your own is not ethical.
Do you want to explore world? please visit